Pages

Friday, June 22, 2012

Using Vocabulary to develop Young Writers! A system with minilessons to use all year!

I am so excited! I finally finished a project I've been working on for a long time. I have always seen the connections between the vocabulary built in 1st grade through arts integration, science and writing and have wanted a way to show the connections to the students as an anchor chart to keep coming back to for writing. For example, at the beginning of the year we work so much on sensory words  during our senses unit in science but by the time we add those in writing, the students seem to have forgotton the learning. Another example are shape words as we teach students how to draw at the very beginning of the year.
I've tried to make and keep multiple anchor charts but it was too much and looked too messy. So for awhile I've wanted to make a bulletin board that could be built all year as an anchor when sensory vocabulary or words great for writing were introduced. I decided to call them Sparkle Words for writing and this is the bulletin board I created. I have windows behind the board so I can never get a good picture. It just doesn't do the board justice... It really does look nice! lol! I don't know how to get a picture that's not grainy!

Now I can make vocabulary learning more permanent through the year and accessible for sudents to use when writing.
I uploaded this to TPT along with over 30 minilessons to teach this vocabulary. Many of the lessons even have the printables that students will need during the lesson. This is also aligned to the ELA common core standards.
The new common core standards ask that students use language to explain their thinking and justify their reasoning. They ask that students see the nuances in the meanings of words and that they are able to identify/ use sensory language. When looking at the standards, there is an emphasis for vocabulary development in 1st grade. Unfortunately, students are coming to school with a smaller vocabulary but expected to use a greater variety of adjectives and sensory language in their speech and writing with the new common core standards. As teachers, we need to ensure our students are exposed to language in order to expand their basic vocabulary before they will be able to use that language in writing. Through explicit vocabulary we can close gaps in our neediest students and expand the vocabulary of our strongest students while building writing skills at the same time.
 Here are a few pics of my preview. The download Vocabulary Mini lessons for Young Writers is 124 pages long!


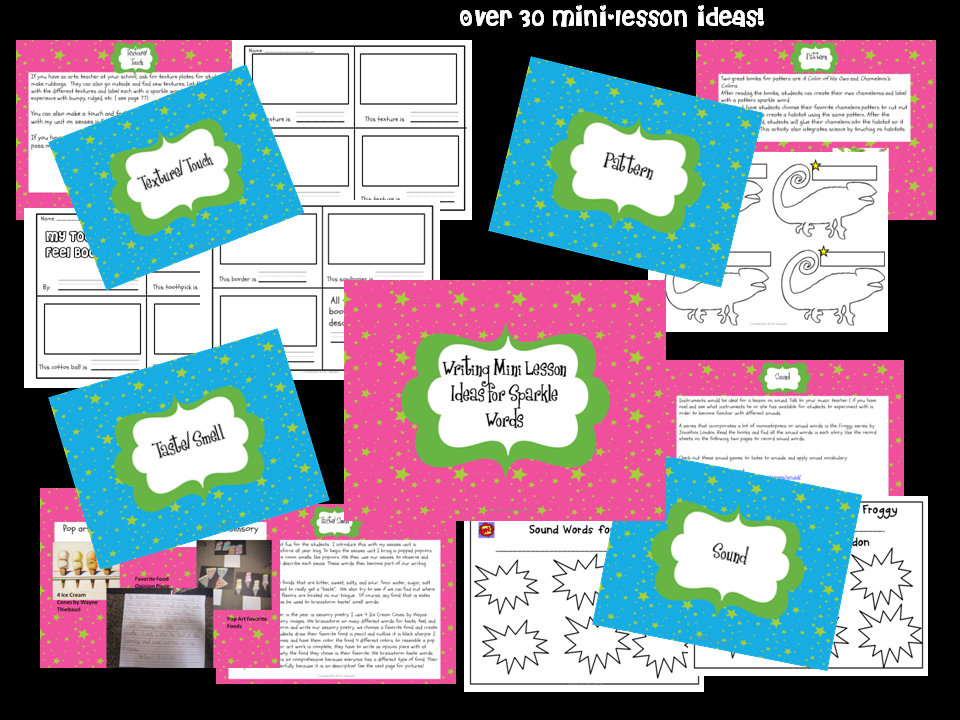

Even if you don't have the space for the bulletin board, you can put the pages in page protectors in a binder for students to use. I really hope others can use this. I truly believe it is a great system to make all the vocabulary development in our classrooms cohesive. It can help students see the connections between subjects and the importance of building language to become better readers and writers. Not to mention the 30 ready mini lessons! If you're interested, check it out on TPT. Have a great weekend!

Friday, June 15, 2012

Math freebies!!

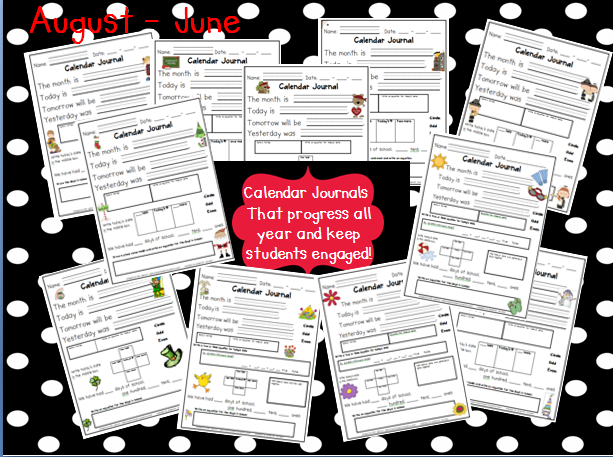
Like so many of you, I have been busy making lots for the new school year. I have had a math problem solving journal for a few years but I wanted to incorporate my calendar pages into the math journal as well, so everything will be together. I am thinking of using a folder with the calendar pages in page protectors so students can use dry erase markers. These are the calendar pages from my TPT store.


I am going to put wide ruled paper in the back for the problem solving journal and this math tool page in the folder as well for students to use as a resource. You can download the math tool page by clicking on the picture.


These don't have anything to do with the Problem Solving journal but...
I also made some Make Ten Playing cards and they are available as a freebie on TPT!


You can pick up the Make Ten Playing Cards here. Leave me comment if you can use any of these math freebies! Have a great weekend!

Monday, June 11, 2012

New Daily 5 Management ideas and freebie!

I know so many of you out there have implemented Daily 5 in your own classroom. I have used this structure faithfully for three years now and love the independence it has created for my students. However, I have had to do some major rethinking about Word Work recently to fit with my expectations for my students.

How many of you have had to tweak the structure a little?

Here's my thinking and rationale as well as the new chart I made. I have freebies included in the post if you're interested in making the chart for yourself.


See, I have always struggled with making sure my students were changing activities within word work. They are usually very on-task but I noticed the same students were always using watercolors or another group always chose whiteboard practice, etc... Then, whenever I put out a word work game, that's all they would choose. For example, sight word Jenga was a huge hit but that was all a few would do during word work. On top of all that, I have my students on differentiated sight word lists and want them to be able to practice reading and spelling those words during word work as well. I tried a word work menu in March but watched and noticed that only my rule followers actually used the menu correctly. Many others just continued to go where they pleased.

I began to think about how I could break word work down into different choices so that the students could be as independent with these as they were with read to self,  read to someone and work on writing.

So this is what I think will work for me and I wanted to share in case any of you had noticed these same issues in your own classroom.

I broke word work into these 3 choices: Sight word work, Weekly Word Work and Games. Sight word work is where they will practice their individual lists. Weekly word work will be word family words and games will be the many literacy games I put out to play to reinforce skills. I will still give choice within these rotations but now students will be more focused on their task. I also added a Teacher's Choice for various seasonal activities/ literacy centers I make.

Here's the new chart I made to reflect these changes. Oh, by the way, I threw in poetry as well! Why not?

P.S. The right side is crooked. That will be fixed! :)


Half the class will use the right side and half the class will use the left side. They will move straight down and retrun back to the top when at the bottom. I use clothespins with names to keep track of students.  Let me know what you think! If you want to make this chart, click here.

Happy Monday!

Sunday, June 3, 2012

Have a 5 Star Day! Management Update and freebie!


****(See here for updated post 6-28-13)*****


 I have been thinking and thinking as we all do over the summer about how to change things up in my classroom for next year. I really struggled with behavior this year so I'm determined to get back to Whole Brain Teaching (check YouTube for more info) and making sure I'm very consistent with discipline. This is my weakness. I need to make sure I always enforce the rules and keep the students accountable.
Here is a freebie of the rules I made. Feel free to edit if you want because I changed the last rule to "Keep everyone happy" because this includes me as well! Click on pic to download!


I started the "5 Star" day at the end of the year to keep students motivated to follow the rules and they seemed to really enjoy it. This was developed to also help lessen my load during pack-up time... See I always stamped the calendar of students who had a "good" day and then write on the calendars of those who broke rules. It took me forever and then the students just started talking and goofing around rather than stand by their desk as they were supposed to do when they pack up. I tried to have a student stamp while I wrote but the wrong day would  get stamped or a student who shouldn't have received a stamp did and I felt like it was making me look unorganized to parents.

This new system held students accountable, helped me with recording problem behavior, saved time at the end of the day and made those wonderful, rule-followers shine!

I added this star behavior calendar to our STAR take home folders.


I love this because students can color in the number of stars they earn at the end of the day to save me time. I just check on the ones " who struggle" with behavior and write the rule(s) they need to work on. This helps students have a goal for each day. It also helps me distinguish those with great behavior from those with good behavior rather than just focusing on those with poor behavior.

Here's how it works:

Students are given a star chart for their desk.I have pink, green and blue. Their goal is 5 stars a day. The students keep track of their own behavior throughout the day with a clothespin on the star chart. I could have done a class star chart but I didn't want behavior displayed and if it is taped to their desk it will be a constant reminder.
 If a students needs a individual consequence, I will quietly motion or whisper that they need to move to 4 stars on their chart. I also write the rule number he or she broke on my class clipboard recording sheet  by his or her name. This method also helps me with behavior documentation. Saves so much time!!! I then have students color in the number of stars they earned at the end of the day. This saves me time as I used to stamp everyone’s folder at the end of the day. Now I just check those students who had less than a 5 star day and write which rule they struggled with. I really like this because I can reward those with great behavior at the end of each week or month and keep track of those struggling! I also like that the behavior recording chart is not posted for everyone to see, it is portable and permanent. Parents like that they know exactly how their child is behaving every day.

I made the 5 star behavior calendars for each month with 2 or 3 different options to fit any school calendar as well as included blank templates in case other teachers'  rules are different than mine. I tried to think of every possibility! There are 33 pages! If you like this idea and want to try it next year, check it out (here) on TPT for $1!!!. I'd love some feedback if anyone downloads. :)

I just added the student star charts as well.


Thursday, May 31, 2012

DIY seat cushion lids for hanging file holders


Hi Everyone!
I hope you all had a great last day of school. I did! We always end the last day with a teacher talent show and it is so fun to dress up and be goofy for the kids. I wish I had pictures to share but I don't. :(

Gosh, it was so busy the last few weeks, I didn't even get to post about a project my mom and I completed about 2 weeks ago. I had seen this idea on a few blogs and wanted these so bad as seats for my guided reading table because they are multifunctional! Who doesn't love multifunctional!

I wanted to give the materials and directions that we came up with in case anyone was wanting to try to make their own.

Materials to make 6 seat cushion lids:
Wood glue
Staple gun
Hot glue gun
Measuring tape
18 x 5/8 wire brads
 28in of 54 inch wide fabric in 3 different colors ( I picked bright blue, pink and purple canvas)
1 yrd of 6 oz batting 
2 bags of fiberfill stuffing ( you could also use foam squares but they were never on sale)
(12) 3/8 Square Dowels cut into (8) pieces @ 17 1/2 length and (8) pieces @13 7/8 in length.
(3) 4 x 2 panel of wood 1/2 thick - I had Home Depot cut mine into (6) 14 3/4 in x 17 in  rectangles
If you don't have Home Depot cut all your wood, you will need a circular or table saw. I highly recommend using their free service!

Once all your pieces are cut to the correct measurements, you are ready to start!
Step 1: Use wood glue to attach dowels around the panel of wood. Then hammer a few wire brads into each side to ensure it is secure.

 Once the dowels are attached around the bottom, the lid should fit nicely over the hanging file holder without slipping.

Step 2: Now that the lid is built, you need to cut the fabric  and staple it to the dowels around the bottom. The easiest way for us was to place the batting and fabric in place, staple 3 sides securely, stuff and then staple the last side. As you can see here if you stuff it first, it becomes too much to manage.


Step 3: After the sides had all been stapled, I trimmed the fabric especially in the corners. You cannot have excess fabric in the corners or the lid will not fit. Once the fabric around the edges was trimmed, I hot glued all the fabric down in between the staples.

This is the finished product!


 I have 6 seat cushion lids altogether. 3 blue, 3 pink and 3 purple. I can't wait to use them next year!
Now I am looking to make over the seat folder/notebook holders. If anyone knows of a good way to DIY for those, I'd love to know how it was done.
Have a great weekend!

Monday, May 14, 2012

Weekly Focus Board- Check it out!

Happy Monday!! I hope everyone had a wonderful Mother's Day! My hubby had to work yesterday but he and my two boys were very sweet on Saturday and we had a great time with breakfast in bed, movies, and dinner. I love them!

I wanted to write about something I've been thinking about for awhile. It's been a project I've needed to finish but have had so many other things to do. I finally got started and finished a few weeks ago. See the idea came from my go-arounds with my principal about posting all of my objectives/ standards on the board every day! I mean come on, primary has so many! It changes every 15-20 minutes sometimes. So we have battled discussed my idea for a weekly focus board that lists the main focus in each subject for a week. She finally felt that this was appropriate for 1st grade. I love it because it now serves as an anchor to prior learning as well! The kids really like it too!
I made three different styles and am thinking about making more. These are just the first three so far.

I included even more than what's shown here. I have all sizes and colors included as well as borders so anyone can customize their board the way they want.
Here's what mine looks like. I used magnetic tape and it made it so easy to manipulate!
The pocket charts (from Lakeshore) are holding my spelling and vocabulary words for the week.

My teammates are already wanting their own set. You can grab yours (here) on TPT if you wish!
Let me know what you think. :)


Tuesday, May 8, 2012

Fluency scoreboarding

Do you scoreboard? Does your principal insist suggest that you keep a score board up in your classroom for fluency?
Mine does so I have been trying to find a way that takes up as little space as possible but looks good and is still functional for the students. I wanted my students to be able to move their name when they made growth so they take more ownership over the process. Here's what I came up with!

It starts at 5 and goes up to 100 and fits perfectly along the bottom of the board! I put magnets on the back of the stars that have their names for easy mobility by the students! I put this up on TPT for free if you can use it! Leave me some comments if you do download!
Happy Teacher Appreciation Week!